Saturday, 3 December 2016

Puppacatchookie Award

I have another very good art friend over on Atcsforall, and if I say no more than that she is the best Puppacatchookie wrangler of all time you all over on Afa know who I am talking about. Now, our head wrangler was having her birthday in October and shortly after announced she was arted out and needed a break. I decided to make her a little birthday present, and as she had mentioned in one of our trading threads that she had so far only ever received prize ribbons but never a trophy for anything my mind was made up. A trophy it HAD to be, and since she is the head Puppacatchookie wrangler... well, you guessed it.

So first we have to clarify, what exactly is this mythical Puppacatchookie? It is a mix of dogs (puppa), cats (cat) and chickens/roosters (chookie).
So into my art supplies I dug, until I reached my polymer clay stash. And this is how the trophy was born.


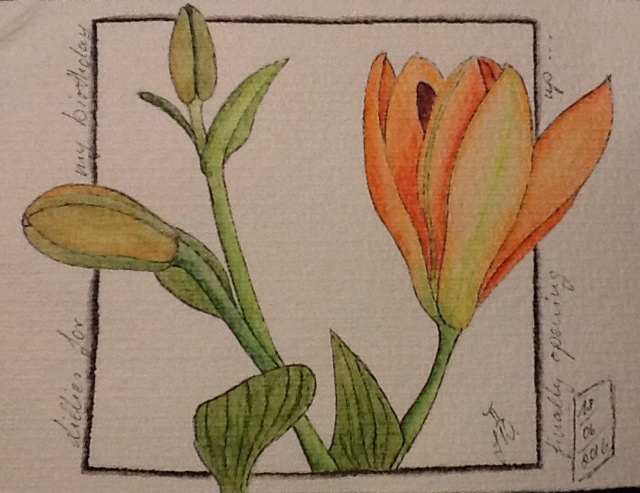
Hold on, this is not yet right, it is only the start of our mythical creature.


Much better already, thanks ro my rudimentary knowledge of Cristie Friesen techniques I was able to produce something dog like, with a cat tail. It just needs a few more details, a base, some additional patina and paint...


and of course feathers...


So far, so good. Now how on earth do I get that over to America IN ONE PIECE???

I knew I had to put it inside something really sturdy, basically unbreakable, and what would be better for that but a coconut shell? I happened to have 4 coconut halves (they used to hold ice cream and after that was eaten I could not throw out the shells so I washed them well and put them aside for later use. However, they were of 4 differently shaped coconuts and so I had to do a little matching to find the shells most suited for one another.
But then, how could I possibly send her the trophy in a plain, wrapped coconut shell? After all, we are artists and crafters, wouldn't it be a bit on the easy side to send it "as is"? 

So out come the paints again...


And I also used some ribbon for a hinge, and used paper collage on the inside


And then, while I was at it and the cream paper looked a bit bland I also did some decoupage flowers inside (thank you Nanner for sending the flower tissues).


Top and bottom insides, with the last finishing touches put on.


For the outside I decided to use a sort of underpainting technique you might say, first I put on a simple background coat, then a white coat where the desing is to be, then the colours for the design, then the 3D outlines and then a coat of varnish.


And with the bubble wrapped award inside it


Yes, I know there is a crack in it. I only had a limited amount of half shells at my disposal and had to make do. However, this crack ruined my original plans of sending it to my friend overseas with just the coconut around it so I did end up sending it wrapped in some more bubble wrap and inside a sturdy box. Just to be on the safe side.

I have received word that my friend has received her birthday present now (I sent it off waaaaay too late, one reason was that the project got bigger and bigger as it developed), and she is over the moon with it. I am happy to know she loves it, I wanted her to feel special as she has been a great inspiration to me and has spurred me on in my arty endeavours at all times. She deserves a little goodness and if you came here from Afa and you know who I made this for, please go ahead and make her a little something as well, RAK her. She deserves it in my opinion...

Go on, do it ;-)


Tuesday, 29 November 2016

Art project for Kristen

It has been too long again. My last post is over a month old and it is about time I update you all again about my arty endeavours. 
In my last posts I introduced a featured artist, Kristen, and I shared with you the beautiful reversible art canvas she made for me with a dragon and an egg.
That really resonated with me and I knew I wanted to make Kristen something with a dragon as well. What better opportunity than for our birthdays for the middle of the year? (Both our birthdays and wedding anniversaries are similar dates, just kind of reversed) 

So I set about planning a beautiful art canvas for her, also featuring polymer clay, but I wasn't really happy with what I was planning. I felt it was too close to what she had done and not original enough. And while I was pondering one day my eyes fell on a set of plain, wooden nesting boxes I had purchased around last christmas. These boxes had recessed lids and in the recessions they all had a fitted canvas board. 

Muahahahahaaaaa, perfect.

After all, why stick to a plan that doesn't feel good enough when you can throw all planning overboard and get creative?

I stuck to the dragon scheme and developed a storyline, to develop as each nesting box is revealed inside the next. The materials I used were acrylic paints, polymer clay and mica powders, wire and seed beads, and last but not least, fabrics and varnish.

The first box tells the story of the beginning of a great love story between Mother earth and a dragon...


I also painted some iridescent medium onto the sides to emphasize the scales of the dragon.

The story continues when the two lovers meet to place a great treasure under the tree of life...


I used the same iridescent medium to make the stars of the universe. The tree fitted nice and snug into the recessed lid.

And the last box reveals what this treasure is all about...


And to finally reveal the treasure within...


I have to admit, it was very hard to let them go to their new home, I enjoyed making every single box and coming up with the story, and basically a lot of heart and thought went into this. I will admit that I did not use all of the canvas boards that came with the set for the set. I indeed was so sad to have to part with this project I decided to use them for myself (there was no more space for them in the boxes anymore anyway), and I made muself another swirly-rooted tree and another mother earth face canvas. They are a little sentimental reminder of this creative adventure. 

As things are, I am in the middle of a christmas project for Kristen. I am trying to get it finished in the next few days so I can still mail it to her in time for Christmas, but I might not be able to pull it off. I might have to post it too late, but should that be the case of course I will let her know.

And now, as a last small visual treat, here is a picture of all the boxes together. 


Sunday, 9 October 2016

Featured Artist: Kristen part III

So now as promised in my last entry, I saved the best pieces that Kristen made for me for last. And this time I am not talking hd/hp but sculpted goodness she sent me for Christmas. I could not believe my eyes when I unwrapped her package and to this day the pieces are on my nightstand right next to my bed so I can see them when I go to sleep and first thing in the morning when I get up.

She made me this beautiful polymer clay snail on canvas, with beads and texture paste! I just love the snails elegantly curved eye antennae.


And then this mindboggling piece. I have never asked her about it but I am pretty sure she even made the canvas herself.


This is the front of the canvas, featuring the cutest Christie Friesen inspired dragon EVER!!! Kristen had mentioned before she was a Christie Friesen fan but I never looked up her works before I saw this. Isn't the dragon just adorable? The dragon and the flower both feature sweetwater and lther pearls and beadwork. 
And then I turned the canvas over...


And here is the treasure the dragon is guarding, one single, beautifully ornamented dragon egg. I love the mixed media approach in this, I have not yet used newspaper or bookpages in my work. And the canvas itself is about 4" deep. I turn the canvas around on my nightstand every now and then, but mostly I like looking at the cute dragon and flower on the front.

THANK YOU KRISTEN! 

To finish off, I will share a little pendant that Kristen made out of her own art and a scrabble tile. And yes, i do wear it on special occasions...


Featured Artist: Kristen part II

I have been away from my blog now for over a month (gosh) and I think it is finally time to finish my featured artist special about the wonderful works I receive from Kristen. Additional to a considerably sized ATC collection I am also the lucky owner of several of her hand drawn envelopes, letters and cards. This girl really has some amazing talent.


I know, the big white patches of paper are a little bit distracting, but I am not really willing to expose either my or her private adresses here, I think whoever reads this will be able to understand that.


This froggy envelope came with some awesome froggy cards inside ;)
And the following fishy envelope has an interesting blob technique as background and the fish are cut out and collaged on. This is a process I would like to explore as well in the future, as it would enable me to make a bunch of background (paper/cards/whatnots) and then add my art on top of that.


And then she also send me a collection of her unique bird cards, again I have to say I am so intrigued by the "blob" background, I really have to try it myself one day...


Yes, yes, the last one wasn't a card, it was another arted up envelope. When I pick the pictures I took for this blog they are kind of small on my screen and so it was hard to tell. I do love the little star tied to his beak though...

Kristen even send me some of her cards with only the linework done, and I have to say I am sooo itching to make them a collaborative project and scan them, print them on watercolour paper, colour them and send the coloured ones back. I have so far been a little hesitant as our styles are very different from each other (which is good, else trading would be boring) and I don't want to be disrespectful to her artwork.

 If you like this idea Kristen, let me know and I will get on it right away ;)


Kristens art and animals make me smile everytime I look at them.

I have more, so much more to post, I will make it a different entry though as already there is a lot of scrolling down involved if you read it all and look at all the lovely art pieces. 


Sunday, 14 August 2016

Featured Artist: Kristen

Hello everyone. Finally the visitors have all left and me and my family are a little bit less busy. I can finally concentrate on getting the big lads back to school in a few weeks and getting their school books in order and also my little ones will be starting playschool in September. How the time has flown, it feels like only yesterday they were little babies learning to crawl...

But enough about me, today I wanted to share somebody elses art for a change. I am trading art and artist trading cards with a girl over in Texas, her name is Kristen. In my opinion she was so good I had no possible chance of getting her to trade with me ever! By now our trades are a monthly event, and the plan (haha) was to trade two atcs every month. Of course we didn't stick to this limitation for long and I am happy and proud to say that we are trading solidly every month now for over a year!! I have asked her permission to feature her art on my blog and she has kindly obliged. I wanted to write this post in our 1 year anniversary month, but alas life got the better of me, our anniversary was in April.


For me it all started off when I noticed some wonderful art pieces she had created and posted on atcsforall.com, she had done a series called "start with a blob". I loved every single piece she came up with and I am a lucky owner of some of them. I think my favourite of these is the grumpy Octopus...


He could be right out of a seacreature version of Taxi Driver "Are you talking to ME?"

Here are the first trades we did, even before the monthly trade started up. You can see some more of her awesome blob creations on the top left.


I love how she creates facial expressions, a lot of the time it seems to me like her animals look like I feel. Grumpy, irritated, tired, all seems to describe me quite well...


I am also a great fan of her birds and the weirdness of the bubble animals above...

Another month she sent me a toadstool series, complete with a canvas extra goodie. I keep thinking the tall shroom on the left is so high it grows into the clouds.


As I said, I am a great fan of her birds. And as to facial expressions, What could ever beat the following three in the middle?


I think another feature of her art is that she uses "stained" paper for arting on. I have to admit I haven't tried that technique yet but it sure adds so much visual interest to a drawing, not to mention the colour variations you would get when painting over these coloured backgrounds. Note to self: try adding colour splatters to cards before drawing on them...


I think the big lipped caterpillar is great. And the walrus remonds me of a walrus that one of the german state owned tv stations had as mascot. I have to ask my parents what the walruses name was, I can only remember it was a girl. 
I think the Flamingo evolution is magnificent, who would have thought that pink long legged birds and snails have a common ancestor?

The whale you see on the top right on the next picture is a drawing of Fred the Fish. Kristen made Fred the Fish for me as a shelf sitting sculpture.
And to me it seems as if I could see the elephants eyelids twitch with a nervous tick anytime now... wait for it... wait for it... just a little longer and it will twitch


This is only part one of my Kristen Collection. She is such a wonderful artist, sometimes she decorates her envelopes, or her letters, and then, of course, there are her mixed media art pieces and sculptures. They all deserve to be shown here, but I am going to make that a second post, depending on the amount of pictures involved maybe there will even be a third post ;)


Sunday, 24 July 2016

Just a quick post

I really have not been posting enough as of late, so I decided it was time to share at least a little bit of what I was up to. 
I is the time of the summer holidays and so all my kids are at home with me, plus some additional guests we have this month. First we got a visit by my parents in law who came over from Germany in a camper van. My in laws are fabulous, my father in law can't sit still and so we gave him diy jobs to do. He finished painting doors I had started (gosh how I hate painting doors), put extra shelves into my kitchen presses and helped putting up a fence so my twins won't be running onto the road. My mother in law is great at tidying, so my kitchen for once was spotless!
Then after they left we got some more visitors, my husbands childhood friend and his family are staying in our house with my hubby and kids. I am taking the little ones every evening to sleep at a friends house who is on vacation. My house is just not able to sleep 10 people!

So as you can see I am plenty busy but still do some arting, after all otherwise I would go nuts. Most of my projects are for people who have not received them yet, while others need a separate explanatory post first. I won't be able for that at the moment so it has to wait until I am back home. 

But I can share with you my first proper whimsical mixed media face! I used markers, acrylic paints and newspaper pieces, I hope you like it. Any tips you can share with me for nose shading, I am all ears...


Sunday, 19 June 2016

Watercolour sketchbook

I have recently been big into bookmaking, but if you have read my previous post about boiling a book you probably already knew that. I have also however been making a sketchbook for exploring my watercolour set I bought July of last year. 
At the same time I bought this w/c set my mother in law passed an old watercolour block on to me, she used to do some very impressive drawing herself. I was not overly fond of the paper I must admit for it was of the very rough sort of variety and as I usually use Inktense pencils I shied away from it at first. I had it basically just lying around in my workspace and for some reason the other day I decided I would take the pages that were left and turn them into a small watercolour sketchbook.
Taking the pages out was not as easy as expected, they were glued down on all sides and I had to carefully cut them all loose. I then folded the pages in half across, decided I would like more than just 4 folios and also folded and tore across the lenght as well. I ended up having 8 folios (not signatures, just folded single pages). Now I have to admit that I can be very stingy somethimes and even though I was not overly fond of the paper, I did not want to loose any pages because I had to glue them to the covers. So instead I added 2 more folios, one in front and one in back, to glue to the inside of the covers, thus enabling me to make use of all the pages I got out of my paper. 
For the covers I decided to stick to my stingy mood and as the watercolour block I had finished off had some very thick board backing, I used that for the extra sturdy covers. I covered it with pieces from an old corduroy shirt my hubby used to have.
This is the finished little sketchbook I got, I loved the hemp cord I used to sew the bookpages to and so I did not hide it all inside the covers but kept it out for closure.


I also used some handmade paper beads made from some newspaper pages I was sent with an art trade overseas.
This is the spine, and no, I did not use the coptic stitch. I am not sure what this one is called, I got it from a very good YouTube Video tutorial on how to make a DIY Watercolour journal.


So by now I am a few pages into my little book and I have to admit, the rough paper I looked down on at first turned out to be THE BEST PAPER EVER! And of course I was so stupid to throw out the cover telling me the brand and weight and the garbage men had already emptied the bins! AAAAARGHH!
Maybe my mother in law will remember what she gave me and be able to organise me some more, and she is the best mother in law there is.

Anyhow, here are the pictures I painted so far. I tried out a good few tutorials on

How to paint lilac


How to paint a tree


Next just a sample of all the colours in my watercolour set


How to paint a Sakura Tree with a splatter method


And then I decided I would try out in watercolour what I want to paint into my moleskine accordion journal with acrylics. Just to figure out if I like the idea, the theme I chose is Tree of Life


Then I was given some Poppy plants for my garden


and then I tried out some more classic techniques. But I think the space I used them in is too small to really bring out every effect properly (or I used too much water and need more practise). I also used my new drawing nibs and Indian Ink for the outlines and the writing.


This is the last picture to date and so far the only one in this book where I used my Inktense pencils. I wanted to "get it right" and so avoided the very medium I want to practise in this book! It is a Lilly from my birthday flower bouquet my husband gave me.


I will wait until the same flower is fully opened and before my kids have torn it apart, and then paint it again but this time using watercolours!